24" F3.5 Mirror Fabrication
Grinding a big, fast 24" F3.5 mirror
This project began with the arrival of a 24" Supremax-33 mirror blank on my doorstep. As is usually the case, this blank was annealed and machined by Newport Glass Works in California, and it arrived without a hiccup. This was to become quite a fast mirror at F3.5, and Newport had pre-generated the surface with a radius of 168". The sagitta, or depth at the center of the blank, was calculated as .429 inches!
My first task was to get the blank under my spherometer and see how much work this one would take to get it ready to polish. I used a 5" measuring ring on the spherometer, and took radius readings in the center, at the 50% zone, and at the edge. On this blank, there was quite a difference. Instead of the perfect sphere that I was wishing for, the radii were 151", 166", and 199" at those three locations. That's not a disaster, as the pre-gen still saved me hours and hours of grinding time. But it meant I would have to start with #120 abrasive and work until I approached a sphere with all three zones equal in measure.
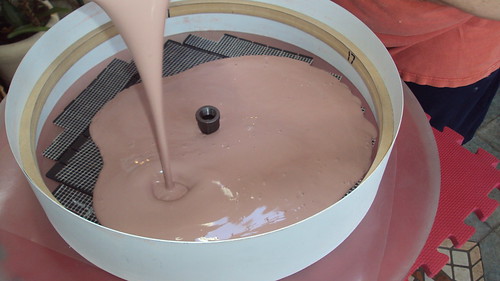
I made up an 18" diameter tile and dental plaster tool, as shown in the photo sequence here. A sheet of adhesive paper was put on the mirror, sticky side up, and tiles were arranged face down on the sticky sheet. The paper keeps the tiles in place while the plaster is being poured. The mold for the plaster was an 18" MDF ring from my set, with a thin plastic strip wrapped around to make a dam. The 18" diameter is chosen to be 75% the size of the primary mirror. The plaster was mixed a little loose, then poured into the waiting mold, up to the level of the 1/2" pipe nipple that I use for a socket for my machine's 5/8" drive pin. After the tool was hard, I used a rotary tool and diamond bit to route shallow grooves between all the tiles. This helps disperse the abrasives, helps the tool grind faster, and avoids suction locks between the tool and mirror.
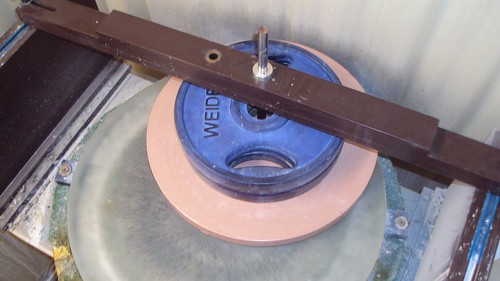
The big glass was placed on the turntable of my fixed-post grinding machine, with the face up. It must be carefully centered to turn with little or no runout when the turntable spins. I get it pretty close to perfect, with less than 40-thou of runout. The mirror is wet down and sprinkled with silicon carbide abrasive, then the tool is put in place on top of the mirror. Overhang in this case was set at about 2.5" to begin. That's about 15% of the diameter of the tool. To deepen the curve, you use less offset, and to lengthen the radius you move the grinding tool away from the center a little bit.
On top of the grinding tool, I loaded up 50 pounds of weights to help speed up the grinding process. This is where a beefy machine is needed. The 2" thick mirror weighs in at about 65 pounds. Add on 50 pounds of grinding weights, and you have 115 pounds spinning on the turntable. Watching that heavy stack go around at 60 rpm's gets you thinking about how sturdy everything reall is! Plus the grinding operation is so noisy that I have to wear earplugs for the coarser grades.
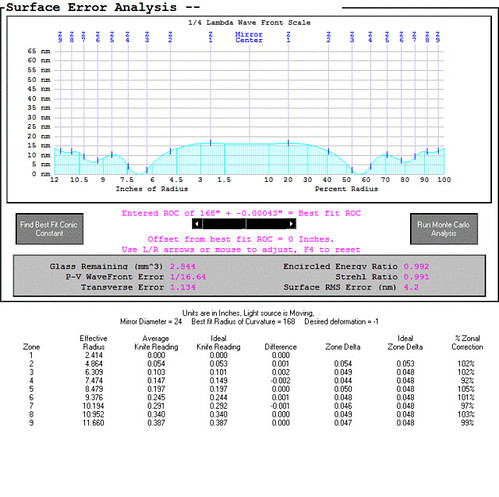
After grinding, polishing and figuring, this 24" F3.5 mirror produced a very nice test result. The larger and the faster the mirror, the tougher it is to get a great surface. FigureXP rated the surface at a bit better than 1/16th wave, P-V on the wavefront. The surface RMS error was given as 4.2 nm, and the Strehl ratio was calulcated by FigXP at .991, which is likely a little optimistic. So this mirror should produce an excellent star test, and I would expect it should allow magnifications easily over 600x, given temperature stabilization, good collimation and excellent seeing.


